| Information in this article is outdated. Some of its content may no longer be accurate due to changes according to the latest game updates. Please replace the old information with up to date information. |
| Page Contents Current As of Patch: | GU12 |
Character Creation
The first step in creating a character is choosing an Empire. In PlanetSide 2, which empire the player decides on means a lot more than just which color armor they will wear. Each of the three iconic Empires has access to unique weapons, vehicles, abilities and more. In choosing an Empire, the player is really choosing a play-style that will mold a character throughout its entire lifetime. Visiting the Empires page will give the player access to not only a quick debriefing of each Empire's strengths, weaknesses, and philosophies in greater detail but also the full history and lore for PlanetSide 2 in the Rise of the Empires section or a quick view of history found in the Timeline of Events section.
 Terran Republic – The Terran Republic’s philosophy of warfare stresses top of the line conventional technology. Their tactics rely on the allowance of maximum sustainable damage, rapid fire rates with less damage output, and high ammo capacity weapons systems. They also have moderately armored vehicles which are the fastest on the field.
- New Conglomerate – The New Conglomerate’s philosophy of warfare stresses brute force, so their tactics rely upon heavy tanks, hard-hitting weapons systems, and shields. Their objective is to smash the enemy during initial contact before they can react.
- Vanu Sovereignty – The Vanu Sovereignty’s philosophy of warfare stresses that technology equals might, and their tactics rely on energy-based weapons using plasma-like ammunition; their guns have less recoil, no bullet drop, and very good accuracy. Their wide armory allow the Vanu to outfit themselves for more situations than their competition.
Once the player has selected an Empire, hit Next to proceed. This is where Server Selection occurs. With the selection of each server there is a chart that also appears to the right indicating the current mix of empires on that server. While playing on a server where your Empire choice is outnumbered will give the player an experience bonus in the short term, it likely will not have any long term benefits as more players continue to join and balance out the server mixes. Once a server has been selected, choose 'Next' to proceed.
Now the player is provided options to choose their character’s gender, face and name before launching into the game itself. There is also an optional tutorial to help you get started. To skip the tutorial, click the box near the bottom of the screen before clicking finish, however it is recommended that all new soldiers complete the tutorial. Once the character is customized to the player’s liking proceed into the game by choosing Finish.
When the player first loads into the game be prepared to be immediately thrust into the heart of some action. The players standard movement keys include Forward/Up W, Right D, Left A and Backwards/Down S. (PS4: ![]() Left Joystick for Moving and Strafe.
Left Joystick for Moving and Strafe. ![]() Right Joystick for Rotation). They player can jump by hitting the spacebar or sprint by holding Shift along with a movement key. Once behind some cover the player can take a breath and get their bearings. The New Player Experience, as this transition into the world is termed, gives the player a chance to jump right into the thick of things. The encounter the player is transported into can be anywhere in the world there is a Hot Spot for action happening, and two friends logging in together may go to entirely different continents and places of action.
Right Joystick for Rotation). They player can jump by hitting the spacebar or sprint by holding Shift along with a movement key. Once behind some cover the player can take a breath and get their bearings. The New Player Experience, as this transition into the world is termed, gives the player a chance to jump right into the thick of things. The encounter the player is transported into can be anywhere in the world there is a Hot Spot for action happening, and two friends logging in together may go to entirely different continents and places of action.
Many players will enjoy being thrust into the action, and it certainly will help players get a quicker feel for combat. However, if the player would like a slightly calmer entrance into the war, hit Esc and log out of the game (PS4: click ![]() touchpad then
touchpad then ![]() square to re-deploy. The default redeploy is the warpgate. Hit x to re-deploy there). Then logging back in will teleport the player to the Warpgate of the continent they first appeared on. The player can also hit ESC then hit the deploy button to jump to another area on the map. The deploy button does use a timer.
square to re-deploy. The default redeploy is the warpgate. Hit x to re-deploy there). Then logging back in will teleport the player to the Warpgate of the continent they first appeared on. The player can also hit ESC then hit the deploy button to jump to another area on the map. The deploy button does use a timer.
A Warpgate is a protected area that cannot be captured or controlled by enemy Empires, however, enemy players may enter the Warpgate areas. This is important to be aware of as there may be an enemy sniper with sights already set on characters just warping in. Warpgates will also serve to be the transition point for characters to travel to different continents. For more information about Warpgates and to read up on the other types of bases found in PlanetSide 2 click here: PS2 World & Base Overview
Choosing a Class
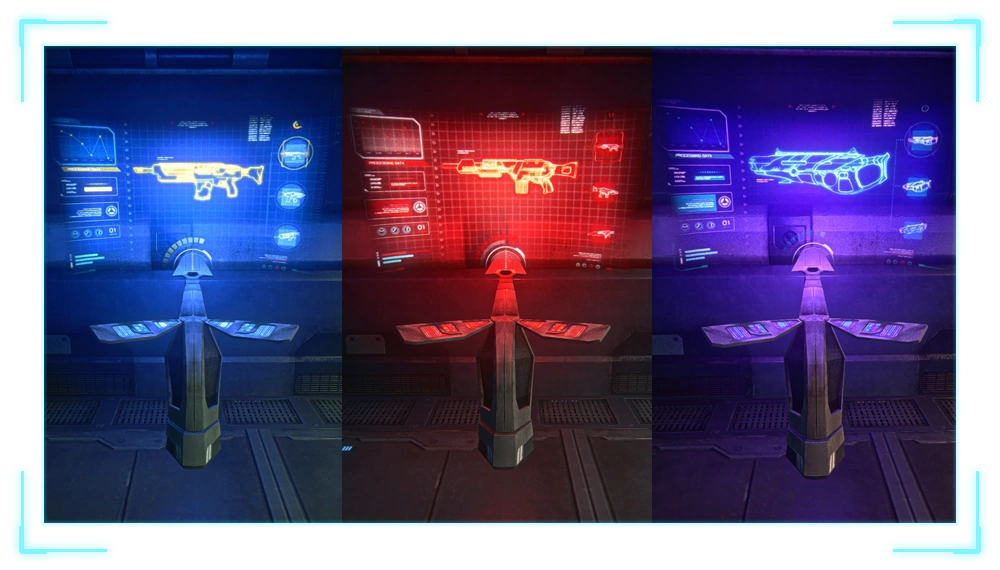
While it may seem the player is finished with character creation there is still one critical step left: choosing a class. Now that the player is in game, the first thing to look for is one of many nearby terminals that appear with a gun icon above it. The color of the icons and terminals will depend on the Empire chosen, but the small icon of the gun is stationary and can be seen through walls so these terminals are easily located throughout various facilities.
Look for this small icon that hovers above the terminal and that can be seen through walls to select a character class.
![]()
Interact with these terminals for class selection by pressing Eon the keyboard. (PS4 Hit ![]() Square)
Square)
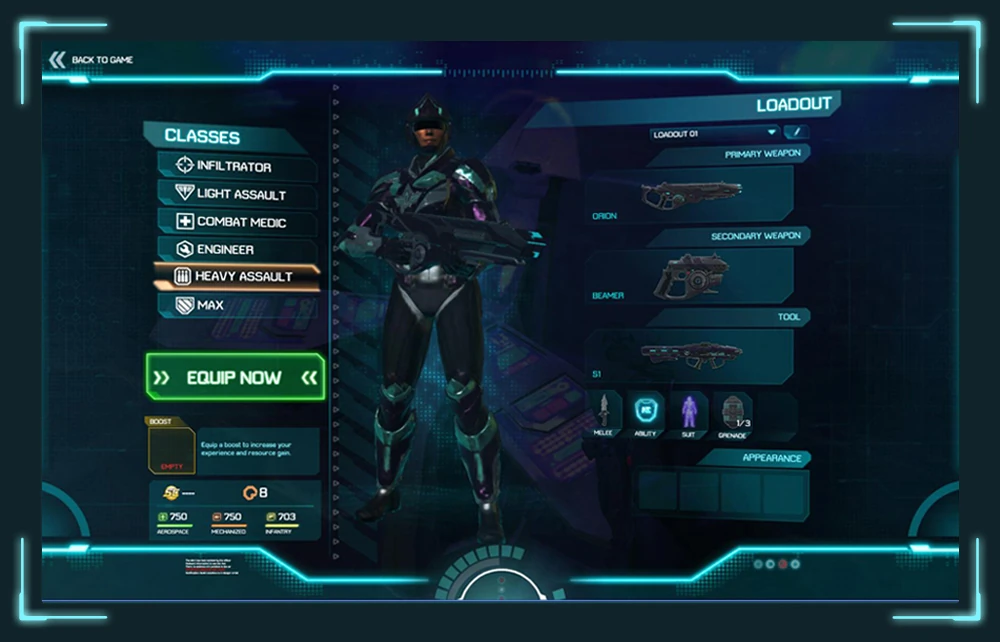
Upon interaction, a new screen will open for the player to show them the class options. Each class contains its own gear, or Loadout, that includes weapons, suit and abilities. The MAX, or Mechanized Assault Exo-Suit, does cost resources to equip, but the others are at the player's disposal. Available choices include:
- Infiltrator - The covert nature of this class gives them a unique set of strengths. As any shadow or heat shimmer could be an Infiltrator lying in wait, the fear they instill in other soldiers is as deadly a weapon as any. Whether they’re relaying critical information to their Empire, lying in wait to strike a target, or preventing an enemy advance, skilled Infiltrators will make sure the only traces they leave behind are enemy corpses. The Infiltrator can also hack terminals and turrets to be used for their Empire.
- Light Assault - Agile and deadly, they serve their Empire as an excellent flanker and skirmisher. The Light Assault is able to choose from a diverse arsenal of various weapon types, including rifles, shotguns, and SMGs making them extremely adaptable on the battlefield. With their Jet pack, they can easily infiltrate enemy bases and flank them.
- Combat Medic - Beyond healing, Combat Medics can do a lot more than just squad support. Though they’re defined by their ability to help others, their customizable rifle establishes them as a force in their own right on the battlefield. Through the use of specialized loadouts and kits, the Combat Medic can become all the more versatile, ready and able to bring whatever is needed to any combat situation. That being said, the Medic is an all around great infantry class capable of tearing through enemy lines in the right hands.
- Engineer - Their infantry training has given them means to remain competitive with other soldiers in medium-to-long range combat as well as allowing them to repair heavy damage on vehicles, facility equipment, and MAX suits in a few seconds. They are also experts in the use of powerful anti-tank and infantry mines, giving them the means to fortify a facility or cause massive and unexpected destruction on the field by trapping a choke point.
- Heavy Assault - Their custom armor configuration is responsible for their ability to take hits that would kill other soldiers, while their heavy weaponry allows them to punch holes in enemy tanks or lay down sustained fire. Equipped with some of the strongest armor and weapons available to infantry, a seasoned Heavy Assault will leave a path of corpses and burning wreckage in their wake.
- MAX - The MAX or Mechanized Assault Exo-Suit is a heavy infantry class that is a step-up from the Heavy Assault class. The MAX is considered a vehicle because of its size and weaponry. It can take a massive amount of damage and has some of the most devastating weapons in the game.
Classes in PlanetSide 2 can be swapped in and out at any time from within the game at these terminals conveniently located throughout almost any facility on Auraxis. So if the player wants to suit up with his or her friends and they prefer a certain class to help out, no problem! If the player feels like sneaking around to explore on the more stealthy side but typically play a Heavy Assault, no problem!
It is important to note that weapons, items and certifications, which will be discussed shortly, do not carry across classes. One character can build up and unlock everything for each class, but this must be done separately. The exception being a few weapons that are shared across classes; which, once unlocked, can be utilized by any class that can use that weapon. These terminals are also where players will return to load new equipment and weapons when they are unlocked.
To learn more about each class, its play style, unique abilities, weapons and unlocks check out the Classes overview found here: PS2 Class Guides
Getting Around Auraxis
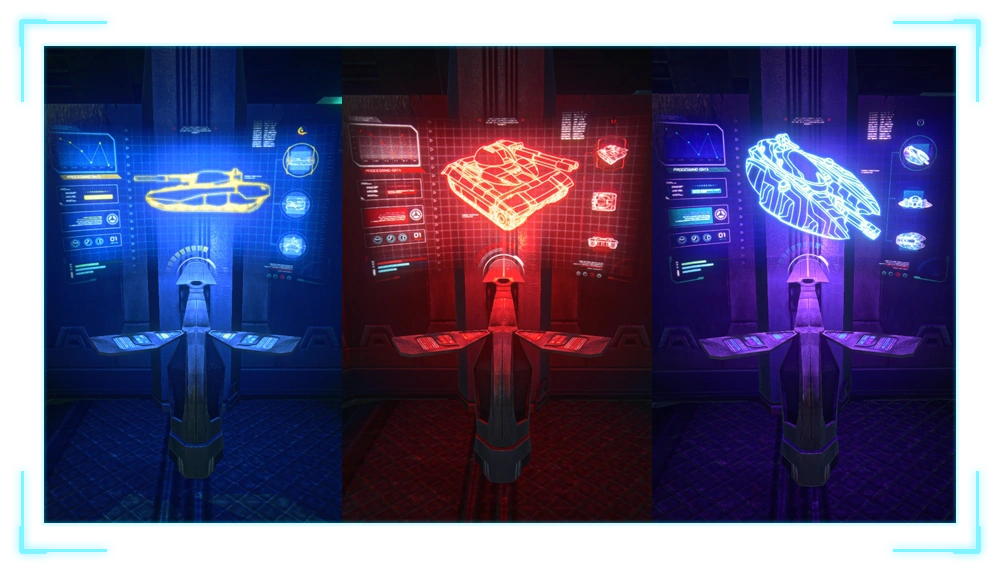
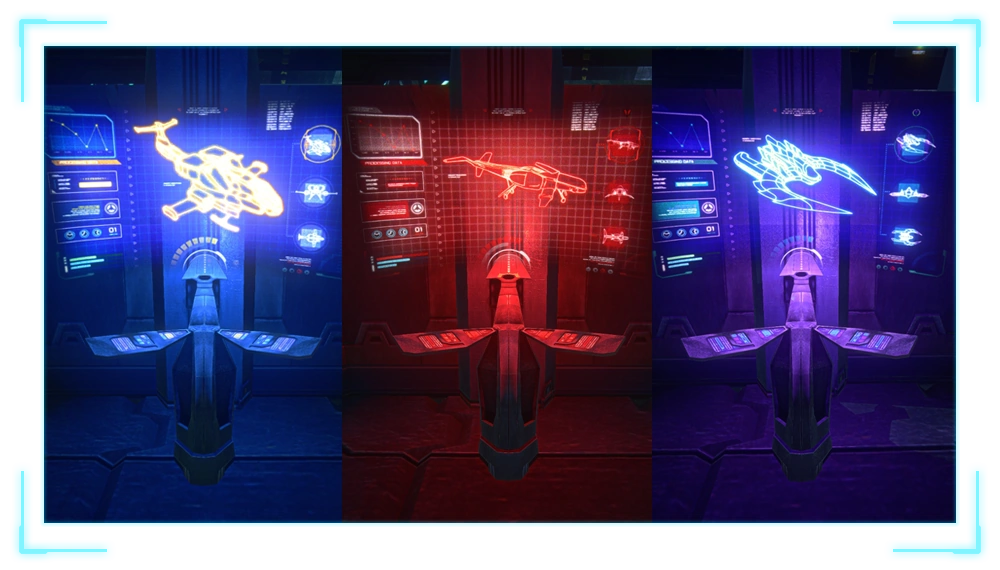
Once the player has picked a class, it's time to pick a means of exploring this beautiful and deadly new world. In a room adjacent to where the player first warps there are two more small icons visible through the walls. One looks like a small tank and one looks like a small airplane. Each of these two types of terminals will show several options for ground vehicles and aircraft vehicles, including unique types of each for each Empire.
Look for this small icon![]() that hovers above the terminal and that can be seen through walls to select a ground transportation vehicle.
that hovers above the terminal and that can be seen through walls to select a ground transportation vehicle.
Interact with these terminals for ground vehicle selection by pressing E on the keyboard.(PS4 hit ![]() Square)
Square)
Look for this small icon![]() that hovers above the terminal and that can be seen through walls to select an aircraft transportation vehicle.
that hovers above the terminal and that can be seen through walls to select an aircraft transportation vehicle.
Interact with these terminals for aircraft selection by pressing E on the keyboard.
Unlike what has become mainstream in MMOs, vehicles should not be thought of as permanent or as "mounts" rather they are used to give an edge to the infantry in battles, drop soldiers at the front of battle, provide quick transportation and as weapons themselves, but they can also be attacked and destroyed.
If the player would like to become the next top Ace of the skies, they are going to need to put in their time in practice. The controls and maneuverability of the flying vehicles may seem intuitive and easy, but are much more difficult to execute in practice. Without the proper time invested in learning and adjusting the controls to fit the player, they’ll often find themselves crashing into the ground with a group full of transports and a hefty waste of precious resources.
Take some time, become familiar with how each craft moves, hovers, and maneuvers. Often times in the beginning, configuring the mouse settings to be less sensitive will help a great deal, and as the player gains experience and comfort with the controls they can slowly return the sensitivity to its default setting. As players practice with their aircraft they should learn to start pushing their boundaries and cutting corners closer and making sharper rolls and turns. Remember, the faster the player can get their aircraft behind a building or a cliff, the higher their chance to turn around and surprise the enemy on their tail.
To learn more about each type of vehicle, including unique Empire vehicles, check out the Vehicles Guides here: PS2 Vehicle Guides
Continents
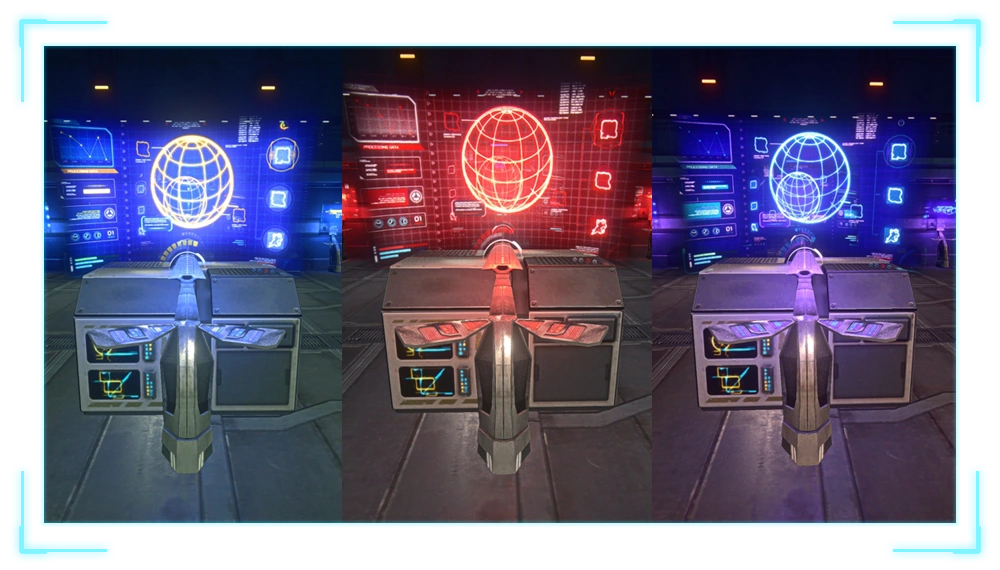
The player will also see one other type of terminal located within their Empire's Warpgate. A small globe indicates the world transport icon and allows players right from the beginning to move between continents and go where they are needed most.
Look for this small icon![]() that hovers above the terminal and that can be seen through walls to select a transport to the continent of choice.
that hovers above the terminal and that can be seen through walls to select a transport to the continent of choice.
Interact with these terminals for continent selection from the world map by pressing E on the keyboard.
Each continent provides an array of different landscapes, hazards and beautiful panoramic environments to experience with no minimum level required. To discover which facilities, resources and territories are located on each continent check here: PS2 World & Base Overview
Off To War
From here players are ready to join the fight! There are a wide variety of ways to join battles. Players can simply explore the world until they find a battle, track the warfront on their Maps, or join into a Hot Spot battle by using the Instant Action feature. These options are each discussed shortly but what does it mean to “fight” exactly? There are Missions and Objectives to complete of course! There are also Bases, Towers, and Outposts to capture, and resources to win control of, if they are adjacent to your territory. There will be times it's important to band an army together and attack an important facility, and other times to defend a facility. To discover more about the various facilities and how to capture or defend them, check here: PS2 World & Base Overview
User Interface
Now that the basics of character creation and transportation have been covered there is more to explore on various screens. Starting with the current screen:

- A — Player Chat
- B — Current Location/Base/Territory
- C — Current Cert Points
- D — Local Map/"Mini Map"
- E — Health (green) and Shields (blue)
- F — Current Ammunition/Grenade Count In Inventory
- G — Cooldown Timer On Abilities
By pressing ESC on the keyboard, the player is taken to their character Summary page.
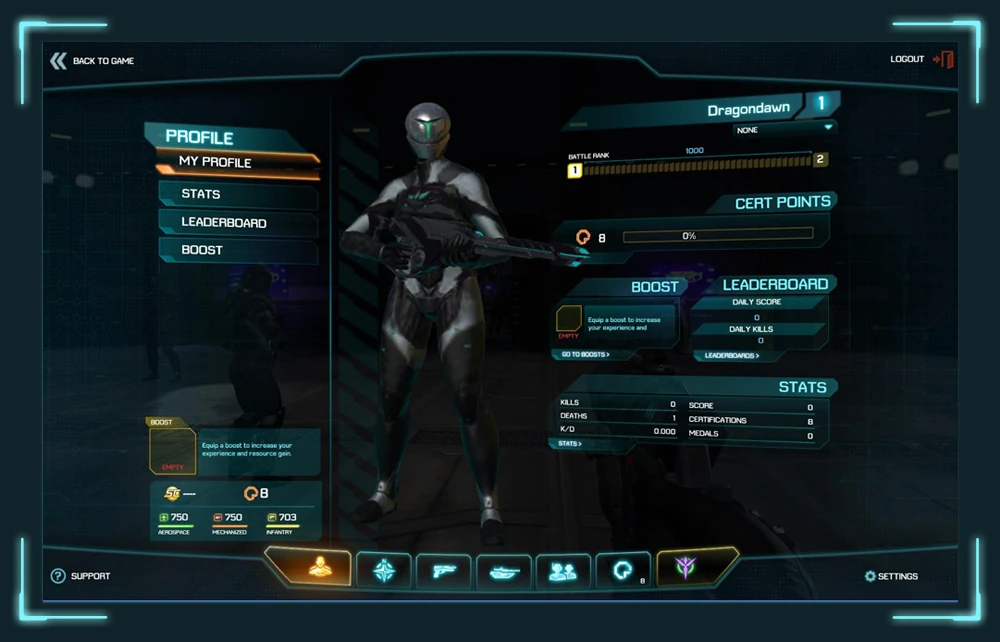
From here the player can quickly take inventory of their character’s level, Cert points, Boosts, Stats, Resources and view the current Leaderboard. This screen allows for simple navigation through and links to all other aspects of the player’s character with the toolbar at the bottom. Spend some time exploring each of these tabs.
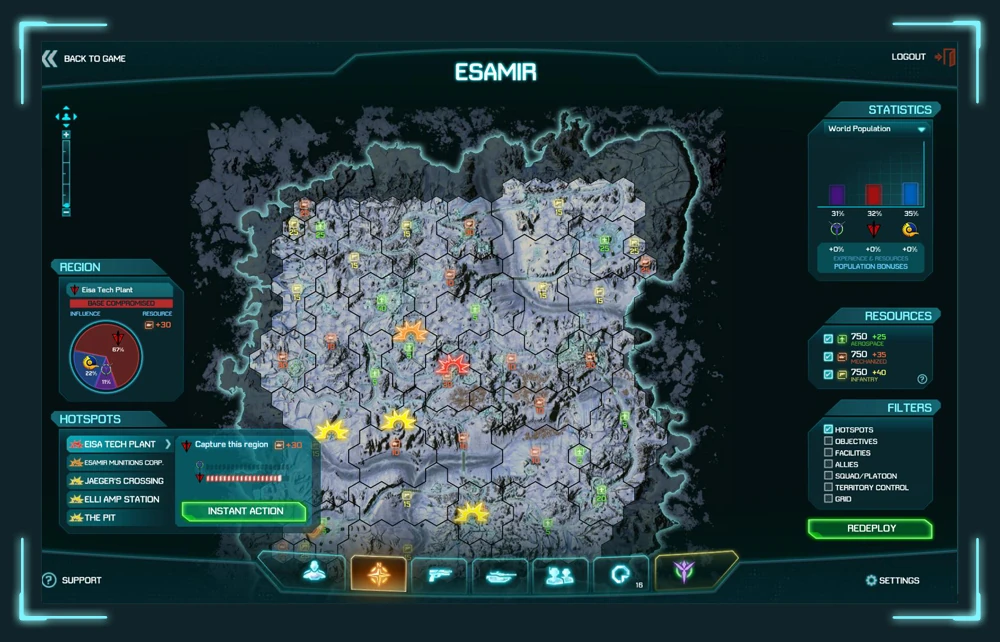
The Map screen warrants some special attention as well. A player can access the Map screen by selecting the second tab on the bottom of the Profile Summary screen or by simply pressing M on the keyboard from the game screen. The Map shares a variety of vital information for new and veteran players. There are several sections to the Map screen including Hot Spots, Empire Population, Resources, and Display options.
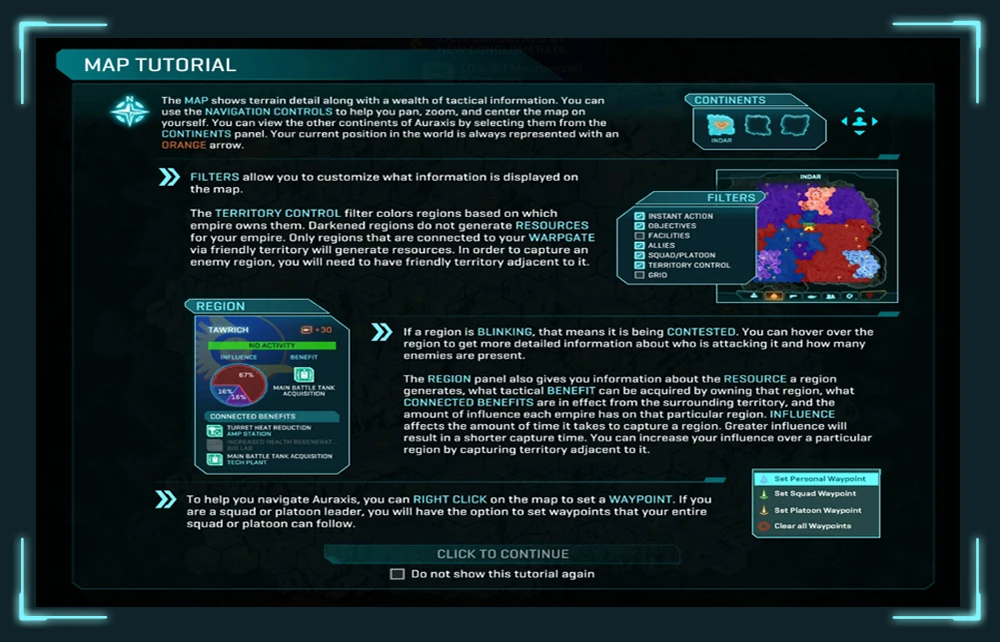
Resources display the players current total resources available, as well as incoming periodic control rewards. When the boxes are checked next to each type of resource, the map will display all the rewards available from territories located on the current continent being displayed. Resources are really the heart of the war on Auraxis. They are needed for building, resupplying characters, purchasing, unlocking, etc. Take some time and read up about the resources system and how it works here: PS2 Resource System Overview
The Empire Population shows the current server’s distribution of players by the Empire. This chart reflects the same Empire distribution as the chart the players sees when creating a character. This may influence player’s choice to switch to a different side for awhile, and help keep better balance across the empires.
Display options allow players the choice of how to filter what they want to see displayed on their Map. Hotspots, Objectives, Facilities, and Territory Control are especially useful. For other World Maps to help locate various facilities, territories and resources, check here: The World Maps
Hotspots are an instant way for players to jump into the fray of battle. By selecting a particular Hot Spot and hitting the green "Deploy" button on the actual map or within the Instant Action box, the player is transported to the battle’s front lines. When there are others from various sides already involved, several bars will appear within the Instant Action box showing how far along the objective is from being completed. This allows the player to decide ahead of time whether it is worth the time and effort to go to this location or look to the next Hot Spot on the list.
Communication is Key
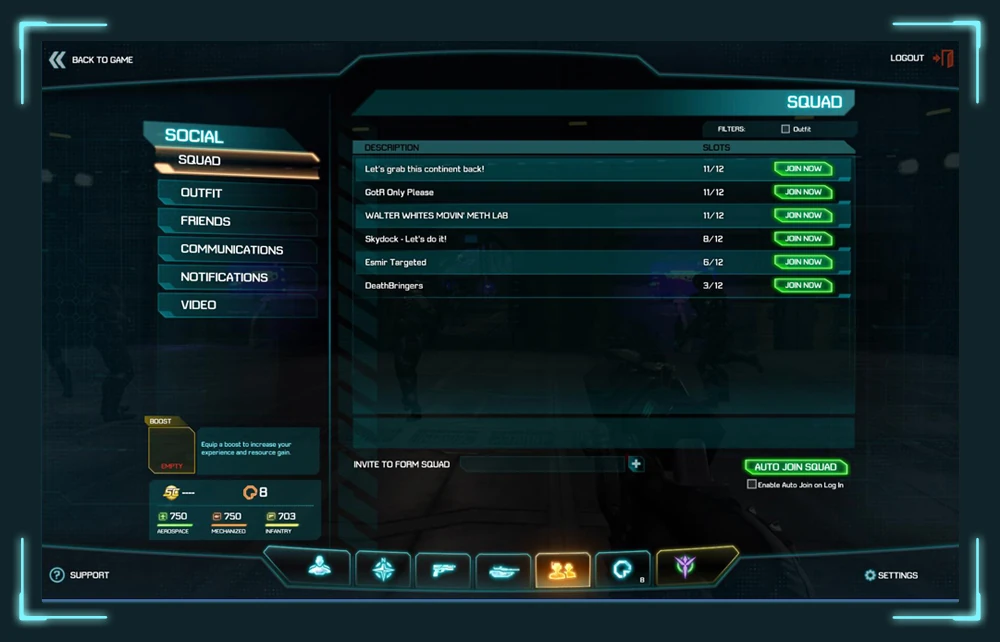
Fighting and winning a war requires a unified front with everyone working together for the betterment of their Empire. Ultimately if the team wins the character wins greater spoils. Teamwork is a vital element in PlanetSide 2 and there is ample opportunity to practice and meet new friends or play with old. By hitting Insert on your keyboard you can instantly join a random Squad, or the player can hit Esc and go to the Social tab (![]() ). From here you can also join a random Squad, select a Squad from the list to join, or invite friends to create a new Squad under the Outfit tab within Social.
). From here you can also join a random Squad, select a Squad from the list to join, or invite friends to create a new Squad under the Outfit tab within Social.
For more useful communication, PlanetSide 2 has taken voice macros to a new level. With the Spot Player system, players simply need to target another character or vehicle and hold Q on their keyboard to open a radial menu of quick macro options. For instance, if targeting a vehicle, the character can Request Transport which triggers a macro notifying the pilot/driver of your location. To open a menu list of voice macros, hit V and then hit one of the following number keys...
| # | Voice Macro | Usage |
|---|---|---|
| 1 | Thanks | Thank nearby ally for heal, revive, repair, etc. |
| 2 | Heal | Request to be healed by a nearby Combat Medic |
| 3 | Repair | Request to be repaired by a nearby Engineer |
| 4 | Ammo | Request Ammunition Package by a nearby Engineer |
| 5 | Transport | Request transport by any nearby Vehicles |
| 6 | Taunt | Taunt nearby player |
| 7 | Help | Request help by a nearby ally |
| 8 | Sorry | Apologize for mistake, such as accidentally shooting a nearby ally |
| 9 | Confirm | Confirm question or statement by nearby ally |
| 0 | Check Fire | Request ally to check their fire |
You'll use V and 1 through 5 the most, and 8 occasionally when accidents happen. Be sure to play around with this system to not only explore its options but become adept at using it.
PlanetSide 2 also includes an in-game VoIP system. While there is still the text box chat system located in the upper left corner of the user interface, the VoIP adds a number of channels. The players can join ones such as Proximity (local area), Squad, Platoon, Squad Leader, Outfit, and Empire with more to come. The VoIP system will add a nice variable for communication among the more serious players. The VoIP system does however require some customization with Keybindings so be sure to spend some time playing with this system too and getting it set up to work efficiently.
Some Other Important Pointers
Weapons
PlanetSide 2 has well over 150 weapons in game for various classes and Empires. All the weapons in PlanetSide 2 can be purchased, if they are not starting weapons for classes, with either Cert Points or Station Cash. Do note that all weapons are "sidegrades" of each other, rather than upgrades. This means that some weapons will be better in some situations more than others, but no obvious "best" weapon. There are also medals for each weapon that can be earned based on kill count that can earn extra cert points for the player. To explore the vast array of weapon options read more here: PS2 Weapons & Equipment Guide
Boosts
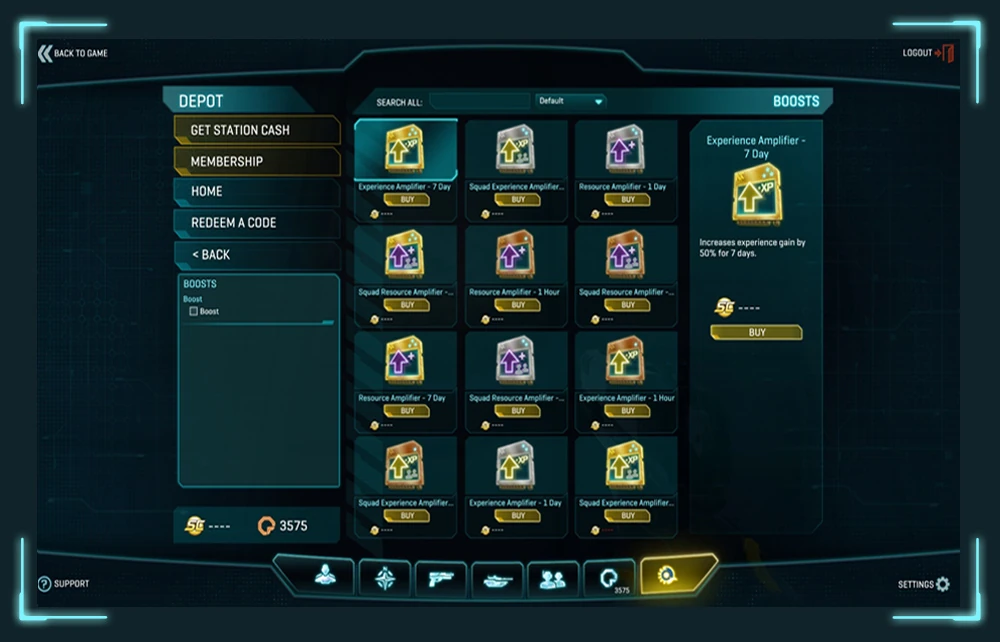
Boosts are enhancements to characters and can do a wide variety of things. Some examples include increasing the rate of accumulation of resources or experience. Some remove or decrease the wait time before re-spawning a destroyed vehicle or speed up reloading, running, aiming, etc. A character can only have one boost equipped at any time, but they are limited in duration, lasting only around 24 hours, and cost Station Cash to purchase. To see a full listing of available Boosts check out the Boosts page.
Certifications
Certifications are awarded with weapon medals, as characters level, or through experience gaining activities. Certification Points are earned with every 250 experience points the player earns. Every weapon, vehicle and class in PlanetSide 2 has its own system of Certifications. Once a player spends certification points on Certs (as they are referred) they desire, the character needs to return to a Class or Vehicle Terminal (depending on the Cert) to load the new ability, weapon, skin, mod or otherwise into their loadouts. Also Cert points will accumulate on a character and represent the character as a whole. However, once a player spends points on an ability it remains with the class it was spent on. The player can view more about their character’s Certs by selecting the link from the Profile Summary page or by selecting the second tab to the right at the bottom of the screen.
Settings
Battle Ready
Armed with not only a new gun but the basic concepts of PlanetSide 2, both veteran and rookie players alike are ready to take the field in this sequel to the landmark MMO FPS. PlanetSide 2 is a massively multiplayer online first person shooter that delivers truly epic, massive combat on a scale never before seen in stunning, breathtaking detail. Join up in battles being waged with thousands of other players in intense land, air and vehicle gameplay where the fight for territory is more than a victory, it's survival. Now as an individual player you should experiment with the extensive skill tree and free-form class-based system. Also customize your soldier, weapons and vehicles to match not just your personal play-style, but the needs of your squad, outfit or Empire. With the potential for battles to last from days to weeks, players will need to build alliances and form specialized combat outfits to take on long-term strategic and tactical initiatives. With air and ground combat, the battles will be larger and more intense than ever. And whether it's "Loyalty until death!" or "Freedom for all!" or "Advance and protect humanity at all costs!", may the best Empire win.
For more Strategy and Tactics, check out the Classes section for a more detailed look on how to play each class. Also check out The World section and learn the in's-and-out's of offense and defense for each base type. When you're ready for more advanced topics, check out Advanced Coordinated Operations to learn how to work in large groups and the Outfits to see about joining one.
Video Tutorials
For more help be sure to check out the Basic Training Video Series found here: Video Tutorials
VR Training Facility
An area inside the world of Planetside where players can practice different infantry weapons and vehicle weapons. Not sure if you want to spend those 1000 certs on a weapon? Head on into the VR Training Facility and give it a test run as long as you like. Is there a vehicle you want to learn how to pilot but don't want to worry about enemy players? The VR Training Facility is calling for you.
See Also
Media
")
")
")
")
")
")
")
")
")
")
")