| Page Contents Current As of Patch: | GU14 |
Template:ClassSummary
Class Overview
After an intense firefight, when the dust settles, every squad and every soldier simply wants to be alive. And if they are, they probably have their Combat Medic to thank. Every class is capable of putting enemies in the grave, but the Combat Medic is the only one that can pull them back out. Yes, their rifle is capable of dropping enemies efficiently. Yes, their versatility on the battlefield is infamous. But, it is their powerful healing tools and abilities that define them. A Combat Medic’s role is to keep their soldiers alive and their empire at full fighting strength. Since a single Combat Medic can make all the difference between holding the line and falling in slaughter, they’re an integral member of any squad and should be regarded as such.
The Combat Medic’s handheld medical applicator provides them with the primary means to make a squad of wounded soldiers fit to fight again. Using a concentrated beam of nanites programmed to mend flesh and dispense coagulation agents, the medical applicator can repair even the most grievous of wounds in seconds. The latest models are even equipped with experimental Field Rebirth technology, allowing the recently dead to be brought back to life. Few others can rival the power and potential of the Combat Medic on the front lines, as they do only things a war-hardened doctor can...saving lives.
While primarily earning points and certs through healing, Combat Medics can serve as roles beyond squad support. Although they’re defined by their ability to help others, their customizable rifle establishes them as a force in their own right on the battlefield. The Assault Rifles they carry are almost unparalleled in medium to long range encounters, only being out-shined by the Infiltrator's sniper rifles. Needless to say, don't take these angels lightly, they may just kill you for it. Through the use of specialized loadouts and kits, the Combat Medic can become all the more versatile, ready and able to bring whatever is needed to any combat situation.
A skilled Combat Medic can hold their own in a firefight and keep their squad mates alive and fully healed.
Certifications
Combat Medic Class Certifications
| ||||||||
| Category | Certification Name | Levels and Cost | ||||||
| Passive Systems | Triage |
| ||||||
| Tool Slot | Medical Applicator |
| ||||||
| Ability Slot | Nano-Regen Device |
| ||||||
| Shield Recharging Field |
| |||||||
| ||||||||
| Suit Modifications | Adrenaline Pump |
| ||||||
| Advanced Shield Capacitor |
| |||||||
| Flak Armor |
| |||||||
| Grenade Bandolier |
| |||||||
| Nanoweave Armor |
| |||||||
| Ammunition Belt |
| |||||||
| Nano-Regen Capacitor |
| |||||||
| Grenade Slot | Nano-Regen Grenade |
| ||||||
| Nanite Revive Grenade |
| |||||||
| Cleansing Grenade |
| |||||||
| Utility Slot | C-4 (Explosives) |
| ||||||
Class Cert Builds
How to spend your first 192 Certification points
- 90 Points - Rank 3 in the Medical Applicator line under Medical Tools
- 41 Points - Rank 3 in the Nano-Regen Device line under Nano-Healing
- 61 Points - Rank 3 in the Flak Armor line under Suit Modifications
What does spending your points this way provide?
- 30% Speed increase to all healing and resurrecting.
- Resurrected Infantry units come back with 70% life.
- Resurrected MAX units come back with 12.5% life.
- Increase the base amount your Nano-Regen Device can heal while reducing the cool down on the device.
- Significantly increases your resistance to explosives (by 30%).
What to buy now?
It is recommended that you focus on first finishing out the Medical Applicator and then Nano-Regen Device Certificates before purchasing any other upgrades/weapons as these tools are what makes up a combat medic. A fully upgraded Medical Applicator will pay for itself almost overnight, and is one of the most valuable tools any soldier can wield.
Now that you have boosted your healing and resurrecting abilities as well as upped your survivability it's probably best to buy some weapons and weapon upgrades. Start off with upgrading your primary weapon of choice whether that is the Assault Rifle or Shotgun. Spend roughly 50 to 70 Certification points on your weapons before switching back to boosting your abilities.
After buying and upgrading your weapons it's time to make the first big purchase of your career. Save up 400 Certification points and buy the Nanite Revive Grenade Certificate. This is the single best way to keep up the momentum while assaulting a base. It will also provide you with something to use all the Infantry resources you have probably been accumulating. After this point it really comes down to preference.
Are there any Certificates that I should not pick up or save for later?
Most of the Certificates have their place and are useful in their own way. However it is recommended that you not commit any points early on into the C4 or Ammunition Belt lines, as they are just not as helpful to the Combat Medic as they are to other classes. When you finish maxing out your healing abilities and have a few weapon attachments it is recommended that you purchase C4 as it provides you with much needed Anti-Vehicle and MAX capabilities. The first level of Triage is something you should probably pick up only once you are comfortable with the cert purchases you have. The later levels of Triage are not nearly as useful as their cost would imply, seeing as level one is more than enough to heal any teammates while traveling.
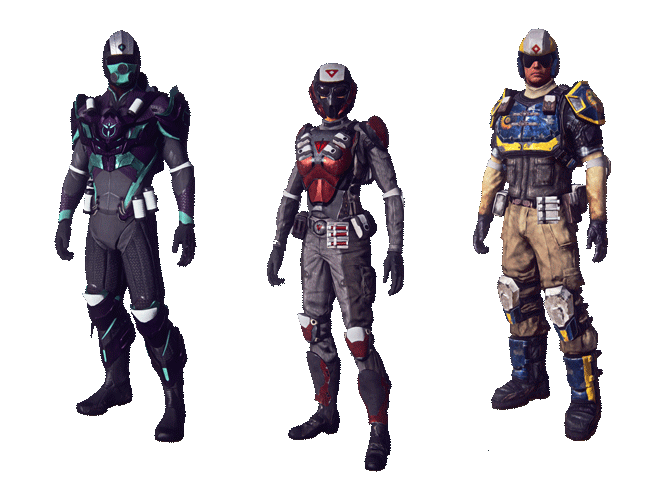
Class Weapons
The following weapon types are available to the Combat Medic class:
Class Cert Builds
- Offensive Medium/Long Range
- Offensive Close Range
- Defensive
- Solo (Rambo Style)
Class Strategy
As a Combat Medic you should always want to be in a squad or, at the very least, close to a large number of players. The true strength of a Combat Medic lies in their ability to put people back in the fight and keep them there. Thus, to get the maximum use out of your class and provide the maximum benefit to your team, you should be as close to the main advance as possible. When in a group, unless otherwise directed by your Squad Leader, you should try to stick with the Heavy Infantry and other front line fighters. There, you will be able to leverage all of your healing abilities to keep the advance rolling, and will have the maximum number of people to defend you while you go about your work.
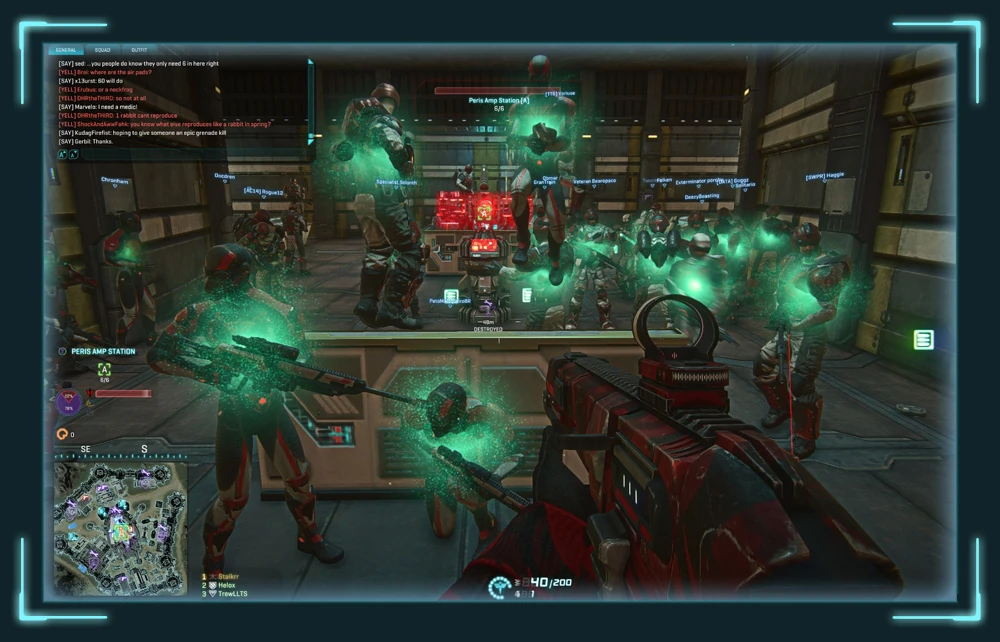
Unfortunately healing technology hasn't progressed as far as many would like. It is important to remember that the Medical Applicator has a limited range and takes a few seconds to revive a downed solider (especially at lower ranks). This limitation of the Medical Applicator means that the best healing ability the Medic has while on the move is their Nano-Regen Device, as the Applicator requires you to slow to a walking pace (at the minimum) to use. While not as quick to heal as the Medical Applicator, it does heal everyone within its radius over time. The best time to use the Nano-Regen Device is when there is a large amount of allies around you, as the healing power gets stronger with each additional ally within range. This makes the Nano-Regen Device your best bet for rapidly treating large groups of people.
The Medical Applicator has two single-target functions; healing (target and hold the left mouse button) and reviving (target and hold the right mouse button). The Medical Applicator does work very quickly once it has been upgraded to level 6. Every upgrade to the Applicator provides a increase to healing/reviving speed, healing power, the minimum health a revived solider comes back with, and maximum range. This last perk is extremely useful for reaching fallen allies from cover. If there is no cover available, and you want to revive someone, an effective strategy is to not stop moving (or using revive grenades instead - see below). Standing still while reviving is an open invitation for a sniper to put a hole in your head. The applicator works while moving, so as long as you stay within range and pointed at your patent, the device will work. The best way to do this is to begin reviving and strafe in a circle around your ally till the revival is complete. If there is not enough room to go in a circle try “dancing” (Rapidly moving back and forth and side to side) to throw off snipers. If you are the only medic in the squad try to stay behind your allies and let their fire distract the enemy while you go about healing and reviving. Remember: your abilities are no use to your squad if you’re dead!
While keeping your allies alive and in the fight is the primary role of the Combat Medic, you will often need to assist with the fight. Being the only class that has access to the Assault Rifle, They have a significant range advantage over carbine armed classes, but they also have access to Shotguns, Pistols and a Combat Knife.
The best way for a Combat Medic to assist in the fight is to use their Assault Rifle to assist the bulk of the squad with engaging targets at range. Between their versatile assault rife and the restorative effects of the Nano-Regen Device, the Combat Medic is no slouch in a firefight. The Nano-Regen Device dramatically increases your survivability over other classes in a combat scenario. While it lacks the same bullet-absorbing qualities of the Heavy Assault’s Nanite Mesh Generator, being able to restore yourself to full health after every engagement is extremely useful. It works best if you stay mobile, bouncing between engagements and cover to maximize your healing time.
One of the most effective tools the medic can deploy (besides a level 6 Medical Applicator) is the revive grenade. It is best if saved for “cleaning up” after a battle, where reviving all your downed teammates before they respawn is impossible to do with your Medical Applicator. Generally, if your squad’s only option for taking an objective is a suicide charge into a room, hang back and chuck in a revive grenade as the battle winds down. Careful use of these grenades can put entire squads back on their feet after a particularly violent engagement.
Newly released technologies allow Combat Medics to replace their Nano-Regen Device in load-outs with a Shield-Regeneration Device. This device quickly restores down allies energy shielding. Combat Medics can spend CERTs to increase the deployment area and shield-recharge speed of the device. Deploy this on the front lines to give your allies a little extra protection where they need it most - on the front lines!
Offensive Close Range Infantry
This is the high risk group, running in the front lines fighting alongside with the Light Assault, Heavy Assault, and MAX units. Your role here is to keep the momentum by ensuring that all allies are fully healed and resurrected as soon as they fall. Remember that while you may not be able to heal a MAX unit you can resurrect them. While in this group you will want to stay in a little back from the group and in cover to hopefully keep the enemy fire off of you. While on the move your best option is to stick with the Heavy Infantry due to lacking the superior mobility of the Light Assault. While not on the move you will want to have the Medical Applicator out and using it at all times. This will help keep the squad topped off in case of an ambush. Once the need to move arises the best option is to switch to your Shotgun to help provide cover fire and to not leave them undefended. The trick to remaining in the fight while assigned to this group is to find and use cover as much as possible.
When using your abilities it is all about timing while running in this group. You will want to use your Nano-Regen Device right when the fighting starts. If possible also try to activate it when it will be able to heal at least five but optimally more as this ability only gets stronger with more allies around. This will provide a significant amount of self-healing to keep you up, buying you some time to get to the wounded or downed allies. Another ability you will want to time your usage of is the Nanite Revive Grenade. The main reason to use these grenades sparingly is because unless you have the Grenade Bandolier Certificate loaded you will only ever have one of these. Another reason to use them wisely is because they cost Infantry currency to replenish. The best situation to use them is when it is guaranteed that it will hit three or more allies.
Offensive Medium/Long Range Infantry
This group is far less dangerous than the Close Range group but is just as important to the success of capturing a base. This group will typically be a smaller one that contains Infiltrators other classes with long range weapons. This group will primarily be providing cover fire and taking out high profile targets from range. Due to being in long range cover is not as important while healing this group. This group also allows the Combat Medic to take a more active role in the fight as constant healing is not as necessary. The first priority while in this group is to ensure that the heavy hitters stay up. This is much easier to do as the damage being brought on will be in a much smaller location and typically hitting only one or two allies at a time making your Medical Applicator sufficient.
As stated before constant healing isn’t needed so when the opportunity arises you should pull out your Assault Rifle with the best scope possible and start taking out high profile targets. These targets are mostly the enemy Infiltrators or providing cover fire for the front line assault squad. While assisting the fight you feel that your allies are taking fire, the Nano-Regen Device provides a great heal that will allow you to keep firing while healing everyone around you. Another option to help out is to run patrols within the squad making sure that everyone is healed or if needed resurrected while watching their backs and taking out anyone that may sneak up on them.
On The Defensive
While defending bases the tactics shift slightly. While normally the Medic is trying to balance healing with getting his fallen allies back into the fight as quickly as possible. While this is still technically the case the resurrecting fallen allies becomes less of an issue. The reasoning for this is due to the close proximity of re-spawn point in area's that your faction currently controls. This will lessen the burden on the Medic to simply keeping up their allies for as long as possible. That doesn't mean you shouldn't resurrect a fallen ally if the moment allows it, remember the more people you can effectively keep in the fight, the more momentum your squad will have to keep the base from being taken.
Timing the use of your Nano-Regen Device is not as much of a factor while defending. You will want to use it early and often as soon as the fight breaks out. As usual make sure that it hits as many allies as possible to guarantee optimal results. Using it as often as possible will help you buy some much needed time to heal them more sufficiently with your Medical Applicator. The Nanite Healing Grenade's will be another very useful asset while defending. These you will want to use on a more limited basis due to only being able to carry one unless you have the Grenade Bandolier Certificate loaded.
Medics can keep the defense going by staying in the fight. Since they can recover health quickly with the Nano Regen Device, while keeping their weapon trained on enemies, Medics can keep a defensible position for a long time. Short of running out of ammo of course, which is why you need those Engineers around. Medics should not be in the front line defense but instead hang slightly back, if a line breaks and allies fall, don't immediately switch to the Medical Applicator as you will quickly find it doesn't kill bad guys well. Instead keep the main weapon in hand and take out any advancing enemies that have no doubt been weakened by front line allies. Wait for a small break in the siege, then get squadmates back on their feet. If things still get too hot and a break seems impossible, don't be afraid to drop a revive grenade which is much faster and doesn't require switching away from your weapon.
Going Solo (Rambo Style)
Every soldier wants to be the one person wrecking crew, single-handedly taking out squads while never requiring the assistance of others. While this style can work for the Combat Medic, its not recommended. Leave these types of heroics to the Light Assault, Heavy Assault, and MAX units. Your strengths are in running with a squad of allies keeping them going. This doesn't mean however that its impossible to accomplish. The Combat Medic has a very distinct advantage over any other class they may fight in a One-on-One battle. They have the ability to heal themselves using the First Aid Kits or Restoration Kits, Nano-Regen Device and Nanite Healing Grenades. Another large advantage that should be capitalized on is utilizing the range of the Assault Rifles to its fullest. While yes the Shotgun is a very potent weapon and you do wear Medium Armor its really only going to take a shot or two before you will go down. This typically makes it best to take out enemies from as far as possible however play styles do vary.
The real trick to fighting a One-on-One fight is to know when to use your heals. Its best to use the Nano-Healing Device right away. This will allow the healing to last for a good portion of the fight. You will want to use the Nanite Healing Grenade only when you are certain it will hit you. Generally this can be accomplished by throwing it ahead of you while on the move. This leaves the decision on where to use your First Aid or Restoration Kits. The timing on these really depends on which one you decide to slot. If you go with the First Aid Kit it is best to wait till you are extremely low on health before using it. The instant healing this provides makes waiting to this kit late in a fight optimal. With the Restoration Kits you will want to use these when you reach roughly half health. This will provide enough time that if not under fire will heal you up a good amount or if currently under fire should heal you enough to allow you to defeat your enemy.
Weapon Ribbons and Medals
With any class, you have the ability to gain Ribbons which will further increase your experience and certifications after completing specific tasks. This list does not include possible vehicle, base capture, or kill/assist related ribbons while playing in a vehicle as that class.
Ribbons
Weapon Ribbons
| Ribbon | Icon | Requirements |
| Assault Ribbon |  |
10 kills. |
| Pistol Ribbon |  |
10 kills. |
| Knife Ribbon |  |
10 kills. |
| Shotgun Ribbon |  |
10 kills. |
| Submachine Gun Ribbon |  |
10 kills. |
Player Ability Ribbons
| Ribbon | Icon | Requirements |
| Healing Ribbon |  |
Heal 10,000 Points |
| Revive Ribbon |  |
15 revives |
Medals
| Medal | Icon | Requirement | Award |
|---|---|---|---|
| No Medal |  |
0 kills | N/A |
| Copper Medal |  |
10 kills | 2 |
| Silver Medal |  |
60 kills | 10 |
| Gold Medal |  |
160 kills | 20 |
| Auraxium Medal |  |
1,160 kills | 200 |
Tutorials/Tips/Gameplay Videos
Strategy and Tactics
Videos
")
")
")
")
")
")
")