(Updated info on the description of the Amp Station.) Tags: Visual edit apiedit |
mNo edit summary Tag: rte-source |
||
| Line 35: | Line 35: | ||
To begin capture of a territory, a player's empire must control the security terminal in the area as well as an adjacent lattice territory. A player cannot capture a base that is not connected through the [[Lattice_Links|Lattice]] network. Players gain bars for the duration of time their empire controls a security terminal. You gain control of a security terminal by standing close to one and remain within its control area and defend it against other empires. It should be noted that MAXs, vehicles and aircraft do not help to capture security terminals/control nodes as they do not influence them. Once the terminal is captured the corresponding occupation timer starts. The standard time is 7 minutes for most Amp Stations. Once a facility is captured or defended, the security terminal transfers over to the winning empire. The losing empires must again gain the security terminal in order for it to be contested and restart the occupation timer. |
To begin capture of a territory, a player's empire must control the security terminal in the area as well as an adjacent lattice territory. A player cannot capture a base that is not connected through the [[Lattice_Links|Lattice]] network. Players gain bars for the duration of time their empire controls a security terminal. You gain control of a security terminal by standing close to one and remain within its control area and defend it against other empires. It should be noted that MAXs, vehicles and aircraft do not help to capture security terminals/control nodes as they do not influence them. Once the terminal is captured the corresponding occupation timer starts. The standard time is 7 minutes for most Amp Stations. Once a facility is captured or defended, the security terminal transfers over to the winning empire. The losing empires must again gain the security terminal in order for it to be contested and restart the occupation timer. |
||
| − | There are also external spawn points at local outposts close to the main base facility. These have their own security terminal that controls this area's cluster of buildings. Taking control of the local outpost security terminal will enable the controlling empire use of vehicle/equipment terminals as well as use the local spawn point. |
+ | There are also external spawn points at local outposts close to the main base facility. These have their own security terminal that controls this area's cluster of buildings. Taking control of the local outpost security terminal will enable the controlling empire use of vehicle/equipment terminals as well as use the local spawn point. |
For all continents, these outposts are in their own space connected via the [[Lattice Links|lattice]] system and are required to be captured before being allowed to capture the main facility. |
For all continents, these outposts are in their own space connected via the [[Lattice Links|lattice]] system and are required to be captured before being allowed to capture the main facility. |
||
| Line 116: | Line 116: | ||
[[Flash|Flash ATVs]] allow troops to quickly maneuver throughout the entire facility. Several station entrances are also wide enough to drive right into and even drive up the stairs. |
[[Flash|Flash ATVs]] allow troops to quickly maneuver throughout the entire facility. Several station entrances are also wide enough to drive right into and even drive up the stairs. |
||
==== Air Vehicle ==== |
==== Air Vehicle ==== |
||
| − | Air vehicles are used to clear incoming infantry, vehicles, and taking out other air vehicles. |
+ | Air vehicles are used to clear incoming infantry, vehicles, and taking out other air vehicles. [[Galaxy|Galaxies]] can be used for troop transport since they can carry 12 troops. |
| − | When possible, use drop pods to spawn into key locations within the Amp Station. In the event that you are overwhelmed as a defender and lose your spawn points and it will happen since there is only one security terminal, a well-placed |
+ | When possible, use drop pods to spawn into key locations within the Amp Station. In the event that you are overwhelmed as a defender and lose your spawn points and it will happen since there is only one security terminal, a well-placed [[Galaxy]] drop on the outposts can set up your empire well to recapture the station. Don't forget that the Amp Station has anti-aircraft artillery on the four corners that are highly effective against all aircraft. |
==== Advance Defense Strategy ==== |
==== Advance Defense Strategy ==== |
||
Revision as of 02:47, 2 December 2015
| Page Contents Current As of Patch: | GU14 |
Return to Planetside 2 - The World
Overview
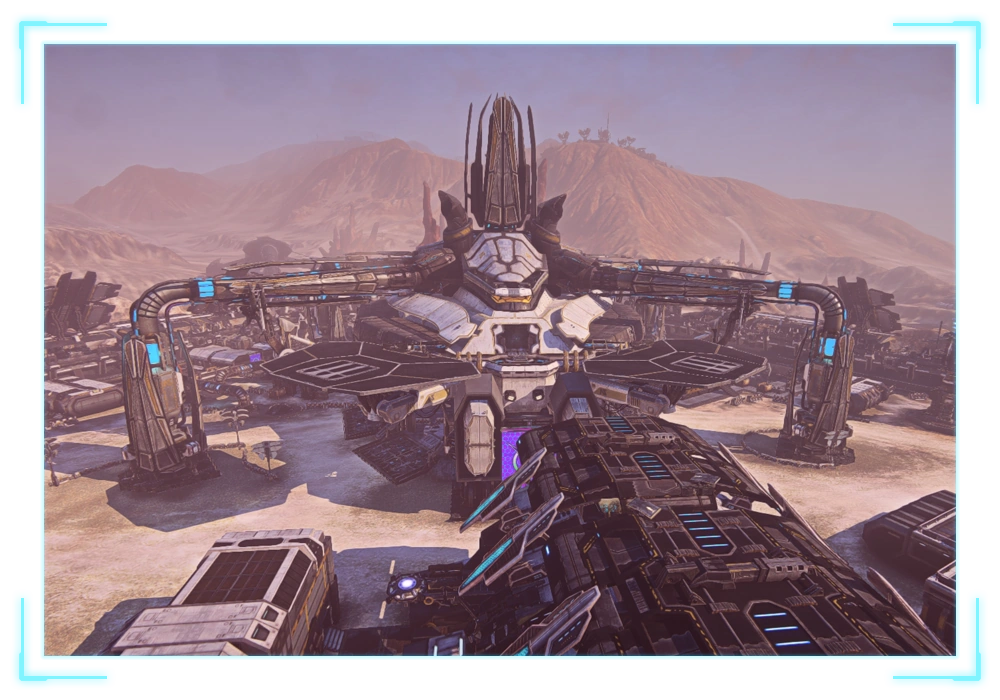
The Amp Station is a base consisting of various buildings encompassing one security terminal. Similar to the Tech Plant, the Amp Station only has one security terminal. In other words, an empire only needs to control the one security terminal to gain control of an Amp Station. Amp Stations are fortified by walls and shields; however, there are breaches in the back accessible to foot troops. The largest building is at the heart of the Amp Station and it is where the security terminal, vehicle terminals, air vehicle terminals, and weapon terminals are located. The spawn point is located at the north part of the Amp Station, which makes it is easy to spawn again to defend especially with the underground tunnels linking the spawn building to the main building. Even though the security terminal is located inside, it is rather easy for vehicles to attack it where at other facilities players cannot use vehicles to capture security terminals. The ultimate reason why an empire would want to gain control of an Amp Station is for its resources. Controlling an Amp Station allows facility turrets to fire for much longer before overheating; also allows facility turrets to auto repair over time.
Indar Continent Amp Station Bases
- Dahaka Amp Station (7 minutes to capture)
- Zurvan Amp Station (3 minutes to capture)
- Peris Amp Station (7 minutes to capture)
Esamir Continent Amp Station Bases
- Nott Amp Station (7 minutes to capture)
- Freyr Amp Station (3 minutes to capture)
- Elli Amp Station (7 minutes to capture)
Amerish Continent Amp Station Bases
- Kwahtee Amp Station (7 minutes to capture)
- Sungrey Amp Station (3 minutes to capture)
- Wokuk Amp Station (7 minutes to capture)
Hossin Continent Amp Station Bases
- Ixtab Amp Station (7 minutes to capture)
- Naum Amp Station (7 minutes to capture)
- Hurakan Amp Station (7 minutes to capture)
Base Capture
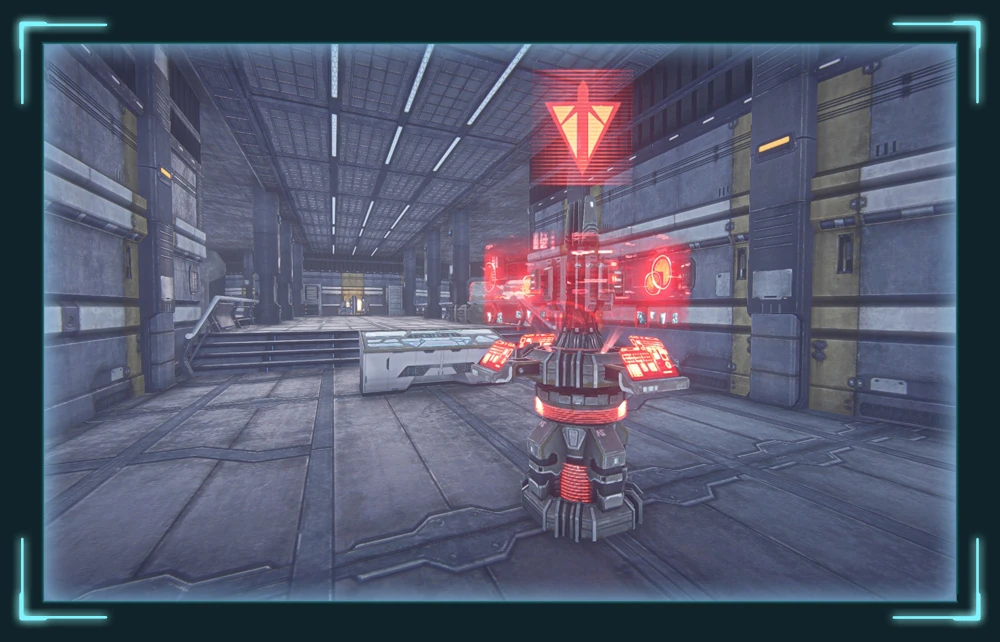
To begin capture of a territory, a player's empire must control the security terminal in the area as well as an adjacent lattice territory. A player cannot capture a base that is not connected through the Lattice network. Players gain bars for the duration of time their empire controls a security terminal. You gain control of a security terminal by standing close to one and remain within its control area and defend it against other empires. It should be noted that MAXs, vehicles and aircraft do not help to capture security terminals/control nodes as they do not influence them. Once the terminal is captured the corresponding occupation timer starts. The standard time is 7 minutes for most Amp Stations. Once a facility is captured or defended, the security terminal transfers over to the winning empire. The losing empires must again gain the security terminal in order for it to be contested and restart the occupation timer.
There are also external spawn points at local outposts close to the main base facility. These have their own security terminal that controls this area's cluster of buildings. Taking control of the local outpost security terminal will enable the controlling empire use of vehicle/equipment terminals as well as use the local spawn point.
For all continents, these outposts are in their own space connected via the lattice system and are required to be captured before being allowed to capture the main facility.
see also Base Capture Mechanics
Base Map

Main Amp Station Facility
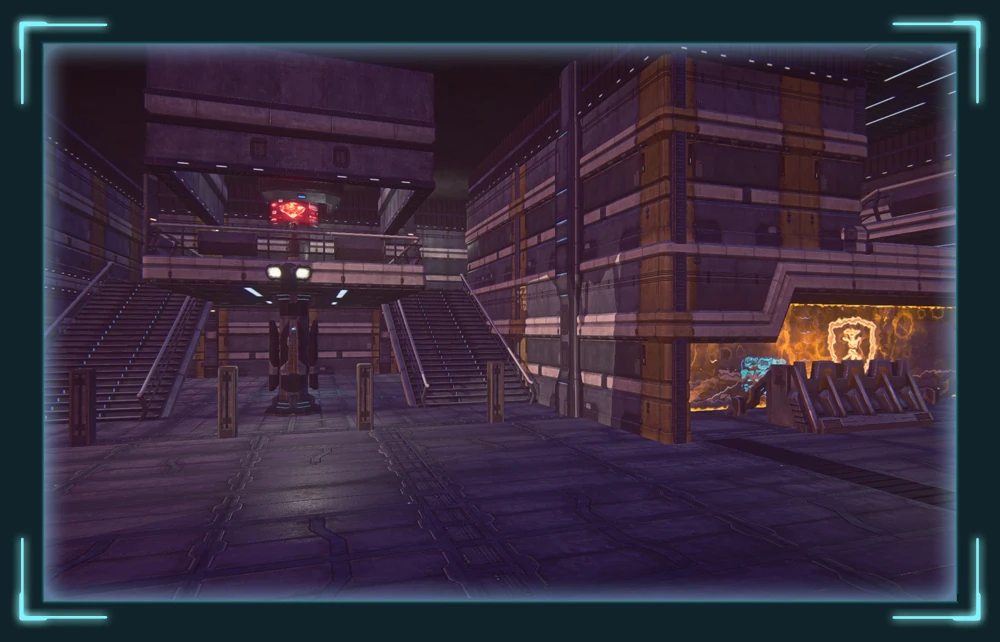
The main Amp Station Facility is a myriad of extrusive constructions around the region. Surrounding the exterior on each corner are turrets used for taking out tanks, air vehicles, and anything else in its way. There are shields on each side close to where the spawn facility is located. On the opposite end and instead of shields, there are barricades that prevent anything but infantry to penetrate. On each side of the Spawn Facility lies a shield generator and there is usually one more on the side of the Amp Station. The north end contains a troop accessible tunnel.
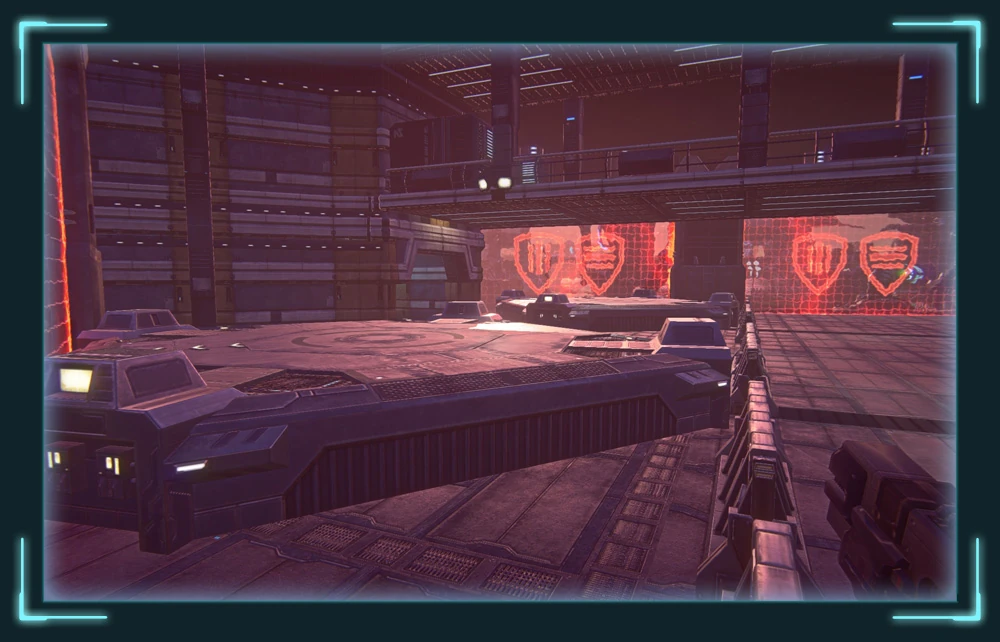
In the heart of the Amp Station is a hangar where all the main components live. In the back of the hangar lies the Spawn Control Unit (SCU) which has two access entries, one in the back and one from the hangar. Both entrances to the SCU are protected by shields. In the hangar area, there are two vehicle terminals, two teleporters to the upper areas, a shield generator, and a security terminal. The teleporters lead up to the air terminal.

There are four buildings within the Amp Station walls that contain shield generators that control the various shields throughout the main facility. Additionally, there is one main spawn building with an equipment terminal that contains ground and roof access.
Outside just beyond the vehicle bay of the main facility, there are two vehicle resupply towers.
See below for some videos of the different lay outs of Amp Stations. The Amp Stations do have different facades, but the general layout of objectives is pretty much the same. A majority of the objectives are located in the hangar area.
Basic Base Strategies
Offensive Strategy
The Amp Station offers numerous borders to venture while attempting a base capture. There are various buildings on each side of the main plant with shield generators, an ammunition tower, and a spawn point. All of the facilities at an Amp Station are observable from the air and accessible by all ground vehicles.
Breaching the massive walls and shields in the Amp Station can be accomplished in numerous ways. A drop pod deployment from the map screen or squad beacon allows for the blunt force approach from above. Airdrop from an air vehicle is also effective in mass quantities. The walls can be scaled with Light Assault troops that can quickly deactivate the shield generators. There is also a breach in the wall along the northwest corner and a tunnel on the north side that can allow troop movement.
On taking the security terminal, it is vital to guard it until the offensive empire wins the territory because the defending empire can come and capture the security terminal back. A squad consisting of Engineers, MAXs, and Medics makes a good team for capturing the terminal.
Take control of one of the outposts surrounding the Amp Station, with the lattice system these facilities are required to gain a network access to capture the Amp Station. These buildings can usually be secured before the defending empire can reach them. This provides a base of operations for the offensive empire that includes air support, ground vehicles, equipment, and spawn terminals. Tank vehicle support will be advantageous but must remain low and close in order to stay out of the turret fire. If the tower is defended and the attacking empire has a large force, then tanks and MAXs should take out the artillery turrets immediately. Place Infiltrators on elevated ridges and hills close to the facility. This allows them to scan the second and third floors and pick off enemy Infiltrators and other targets before they can get into the fight.
The next things to focus on are the turrets. They are usually located on the four corners of the Amp Station. There are two tiers of turrets. Turrets can hurt both air and land operations, so these should be taken out first.
After the turrets are taken down, focus next on the shields. Taking down the shields will allow vehicles to come in, bringing more than just infantry to the offensive attack. There are two layers of shields. The first layer helps defend the walls and the second layer defends the security terminal.
The main Amp Station facility is accessible from multiple sides, including a ground vehicle hangar bay and a teleporter located in the air vehicle dock on the roof. Once inside, Light Assault can jump up above and into the Shield Generator rooms while also getting a good view of the target area in case there are defenders lying in wait. Check the observation platform on one end just above the security terminal floor for an Engineer behind a turret or an Infiltrator.
Assault Infantry
An Amp Station is a vast, secured location and because of that the use of all infantry and ground vehicles is highly advantageous. There are terrain features surrounding the Amp Station to hide behind and gather up forces to start a big assault. Use Light Assault's jump pack ability to hop onto the Amp Station wall; these players can then create general disarray and destroy the Shield Generators.
The very top of the wall has jump warps for escaping or moving to another side of the Amp Station since the base is so big. Light Assaults can gain access into certain facilities quicker and take the defenders by surprise. The disadvantage to Light Assault’s mobility is that it is difficult for a Medic to heal them. Set up Infiltrators around the Amp Station, particularly close to choke/spawn points. A great place to hide an Infiltrator is on the upper platform above the main Amp Station security terminal. This position provides an excellent view of approaching players, as well as slight camouflage from the array of lights next to the computers. Hills, terrain arches, and cliffs overlooking choke/spawn points are perfect observation locations.

Engineers compliment MAXs and are great for clearing buildings and capturing the security terminal. Heavy Assault should utilize their shield special ability when taking damage in a hostile guarded room. Take out the defenders' turrets early to ensure the safety of supporting assault forces. Look out for any ground patrol vehicles while proceeding between security terminals, taking the offensive when able to destroy enemy forces. Heavy Assault and anti-vehicle MAXs are best at taking defenders out during the initial assault if ground vehicle support is unavailable. Engineers and MAXs should guard a security terminal after it is captured. Engineers can help repair the heavily used MAXs, as well as set up turrets at critical choke points like the defender’s spawn facility.
Ground Vehicle
Once the Shield Generators are destroyed, ground vehicles can enter the Amp Station areas with ease. The main objective for ground vehicles is to clear enemy infantry that may be hiding behind obstacles or defending the base. A great way to get infantry players to the Amp Station quickly is to load them up in a Sunderer. Ground vehicles and infantry working together can attack the center of the Amp Station. Gunners on the Sunderer and ground vehicles should clear open areas, allowing infantry to take control of terminals. Flash ATVs are fast and allow single infantry units to get to places quickly when there are no Sunderers around. Initially, use Lightning tanks to take out the turrets around the Amp Station. After that, Lightning tanks should take advantage of their quick speed and roam around the area, clearing out defending infantry units, especially MAXs. Main battle tanks (Magrider/Vanguard/Prowler) can be used just like Lightning, taking out turrets, vehicles, and then infantry; however, they should be used from a distance. Their long range weapons can also be used as guards on the outskirts of the base in order to pick off any reinforcements rolling in.
Air Vehicle
Empire Specific Fighters (Scythe/Reaver/Mosquito) are useful for air support, attacking the other defending empire's aerial vehicles. Use Liberators to take out the turrets. Liberators are great at taking out ground troops and preventing defending infantry from leaving the spawn facility. They can also take out incoming defending troops and vehicles coming from other facilities for backup. They are also useful for reconnaissance since they have a great aerial view. When able, attacking players should use drop pods to spawn into a base, taking out vehicles and defending players upon landing. Unfortunately, the same can happen to your own empire.
Advanced Offensive Strategies for the Amp Station
- The first objective will be to take out the shield generators. Eventually, ground vehicles will come in and destroy everything. Why not the turrets first? Well this is a more silent attack into the station, sending in small assault groups to kill the shield generators. When the shields are finally down, rush in with a heavy ground vehicle ensemble. Now the ground vehicles will take out the turrets and any enemy ground targets around. After the shield generators are down, the next objective is to camp the enemies spawn facility, preventing any further defensive units to repair the shields or turrets. And finally, the hangar area will be the last objective starting with the SCU.
- Specific roles for this strategy:
- Light Assault
- Heavy Assault
- ...And More
- Another strategy for offensive attacks on the Amp Station is to deploy a Sunderer outside in the back of it against the wall or further away behind some larger terrain. Unless the defending empire is coordinated with excellent communication, they won't know a Sunderer exists.
Defensive Strategy
The center of the Amp Station has a lot of weapons to assist in defending. Turrets cover the four corners; there is a spawning facility, and several weapon and vehicles terminals. There is also an air vehicle terminal on top of the hangar area. Most of the time, the outer north, west, and east facilities will be taken first because they are the first facilities the attacking empires reach. The first line of defense is to hold those facilities as the lattice system will protect the Amp Station.
Assault Infantry
Use Light Assault's maneuverability to quickly recapture an undefended security terminal from the north, west, and east facilities. When possible, try and choose alternative routes when entering into a facility such as platforms, balconies, and roofs in order to seize the element of surprise. Light Assault infantry can also be used as roaming scouts along the side streets of the the Amp Station in order to catch a group of attackers in transit to their next target and notify reinforcements. Hopping from rooftop to rooftop is another safer alternative when defending an Amp Station when a large force has occupied a good portion of the base.
Heavy Assault troops should be used alongside MAXs in recapturing defended security terminals. Employ their shield special ability just before entering a hostile room. When defending a security terminal, crouch down in a corner out of sight of doors and windows with the terminal still visible in order to get the upper hand on the attackers while they are hacking. Switch over to the anti-vehicle weapon to lock on and destroy an invading force especially if they come in with air power. Heavy Assault troops can also be used to take out vehicles with their unique weapon; entering through shields that are broken or down and using that as their passageway.
Ground Vehicle
A Sunderer placed inside the main hanger right under the security terminal should always be placed to speed the respawn process in a more strategic location. Additionally if the enemy has not penetrated the walls, placing a Sunderer at the corner of a tower to allow troops to continue to support and scale the towers to let MAXs and Heavy Assault defend against tanks as well as engineers manning and supporting the repair of turrets.
There is hardly any room inside for vehicles to move around so they are best used to guard the outside perimeter or lead an assault back against territories lost during an assault. Get troops to a hacked security terminal quickly via Flash ATVs and Sunderers. Charge hotspots and Galaxy landing sites with tanks to secure the area quickly.
Flash ATVs allow troops to quickly maneuver throughout the entire facility. Several station entrances are also wide enough to drive right into and even drive up the stairs.
Air Vehicle
Air vehicles are used to clear incoming infantry, vehicles, and taking out other air vehicles. Galaxies can be used for troop transport since they can carry 12 troops.
When possible, use drop pods to spawn into key locations within the Amp Station. In the event that you are overwhelmed as a defender and lose your spawn points and it will happen since there is only one security terminal, a well-placed Galaxy drop on the outposts can set up your empire well to recapture the station. Don't forget that the Amp Station has anti-aircraft artillery on the four corners that are highly effective against all aircraft.
Advance Defense Strategy
- This is for a scenario where the defense has been pushed back to the hangar and has lost the Main Amp Station Spawn Facility. Losing the Main Spawn Facility would result in the defensive empire having to spawn from the outer Amp Station facilities, consequently making a longer trek back to the main area.
- A well timed MAX crash supported by engineers and medics can run through the tunnels from the main spawn point to secure the SCU as a last stand effort if all the shields are down. Holding this location until reinforcements can bring back up the shield generators to force the enemy back to the outer rings of the facility and out of the hanger.
Media
")
")
")
")